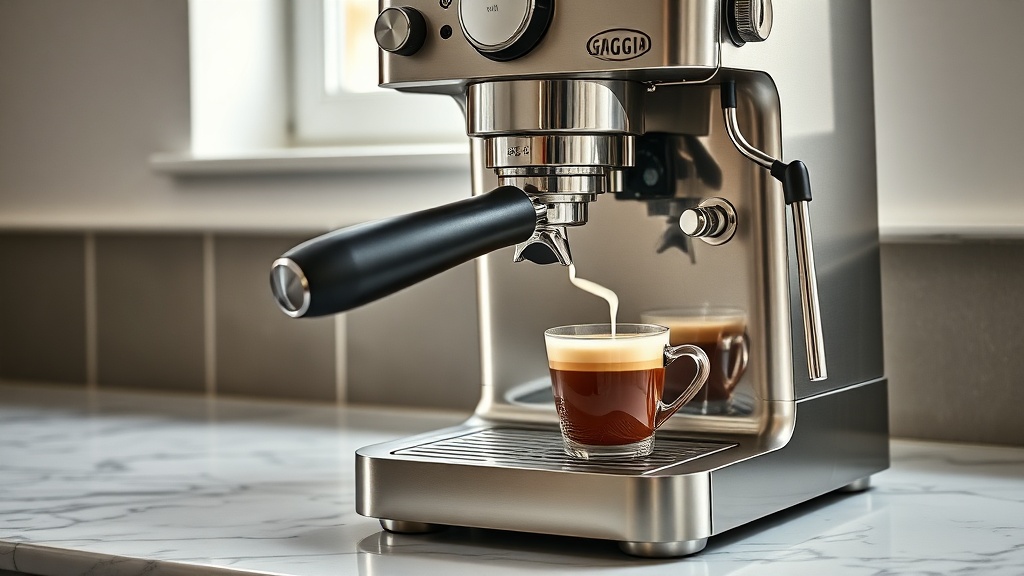
The Gaggia Classic Pro: From Steam Wand to Silky Microfoam
Mastering milk steaming on the Gaggia Classic Pro is the single most rewarding upgrade you can make to your home latte game. The machine’s commercial-style steam wand is notoriously powerful, but without proper technique, you will end up with big, unstable bubbles rather than the silky microfoam that makes a latte or cappuccino truly great. This guide cuts through the hype and gives you the practical, step-by-step knowledge to produce café-quality foam, from purging the wand to pouring the perfect rosetta.
Why Does the Gaggia Classic Pro Steam Wand Need a 5-Second Purge?
The Gaggia Classic Pro’s steam boiler is directly connected to the brewing boiler, meaning residual hot water and occasional condensation can sit in the wand. If you don’t purge this before steaming, those first few seconds of steam will be wet and inconsistent, throwing off your timing and water-to-milk ratio.
The purge routine:
- Turn the steam knob fully open for 5 seconds, aiming the wand into the drip tray.
- You will see a burst of water followed by pure, dry steam. That’s your cue to shut the knob.
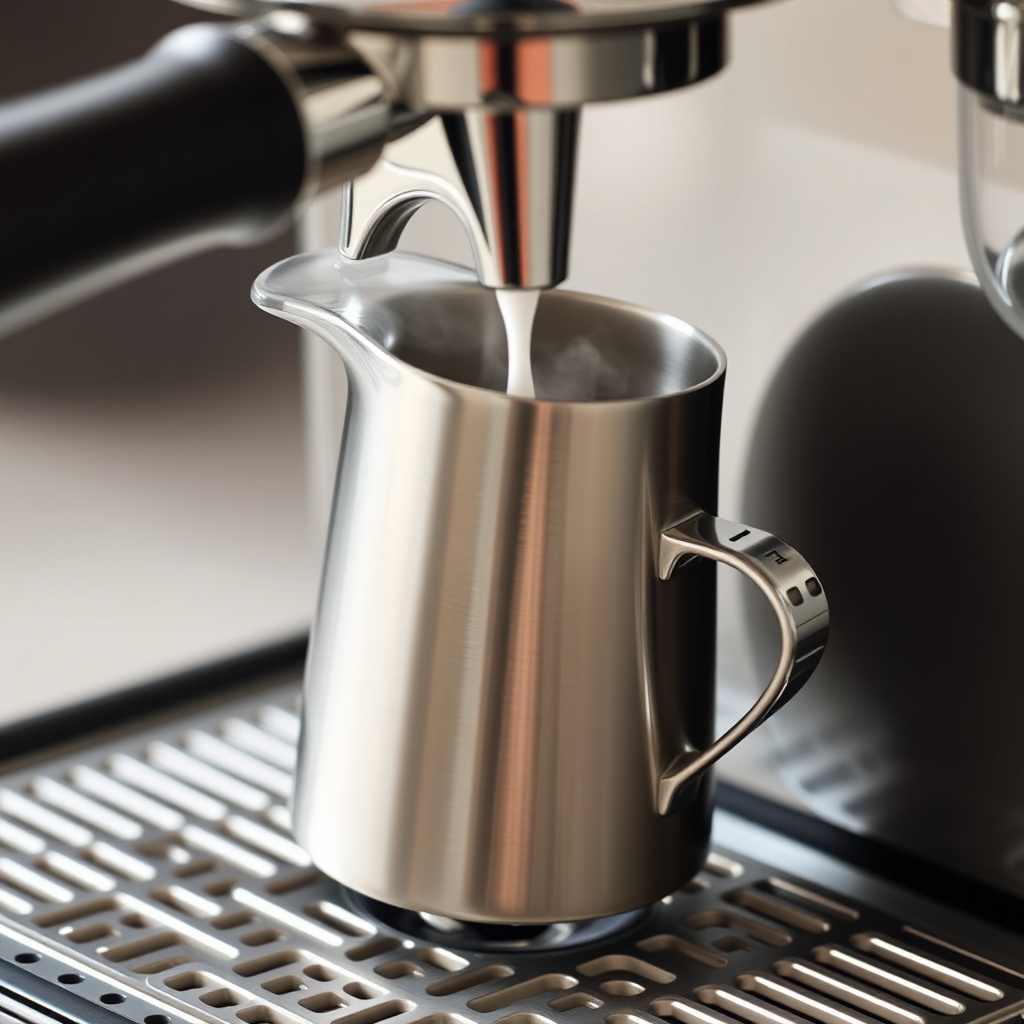
- Now, immediately place the wand into your cold milk pitcher and open the steam knob fully. This delivers the hottest, most consistent steam from the very first second.
Skipping this step is the number one reason beginners struggle to get microfoam. A dry start prevents excess water from diluting the milk proteins, which is what allows those tiny bubbles to form and stabilise.
What’s the Correct Pitcher Size and Fill Level for the Gaggia Classic Pro?
Using the wrong pitcher size is a common oversight. The Gaggia Classic Pro’s wand is relatively short, so you need a pitcher that fits comfortably under the wand without tilting.
Pitcher recommendations:
- For a single latte (180–240 ml): Use a 350 ml (12 oz) pitcher. Fill to just below the spout base—approximately 150–180 ml of cold milk.
- For two lattes or a large cappuccino: Use a 600 ml (20 oz) pitcher. Fill to around 300–350 ml.
Why this matters: Overfilling makes it nearly impossible to get the vortex action (stretching and texturing). Underfilling means the tip is too deep, and you’ll only heat the milk without incorporating air. The ideal fill level is where the wand tip is submerged about 1 cm below the milk surface.
What’s the Best Technique: Stretching vs. Texturing on This Machine?
The Gaggia Classic Pro’s steam pressure is higher than most home machines—roughly 3.5–4 bar when working correctly. This means you have a very short window to stretch the milk before it overheats.
Stretching (incorporating air):
- Start with the wand tip just below the milk surface. You should hear a soft, paper-tearing hiss (not a violent gurgle). This lasts only 5–10 seconds.
- During this phase, the milk volume should increase by about 20–30%. For a 150 ml fill, you’ll end up with roughly 180–195 ml of stretched milk.
Texturing (creating the vortex):
- After stretching, lower the pitcher so the wand tip is deeper. You want a gentle whirlpool—not splashing—that pulls the bubbles down into the liquid.
- Continue until the pitcher becomes uncomfortable to hold (55–60°C / 130–140°F). Over-texturing beyond 65°C will break the protein bonds and produce a grainy foam.
Tip: If you hear a loud, honking sound, the tip is too deep—raise the pitcher slightly. If you see large bubbles on the surface, you’re stretching too aggressively and need to position the tip shallower.
How Does the Gaggia Classic Pro’s PID Mod Affect Milk Steaming?
The stock Gaggia Classic Pro does not have a PID controller, meaning steam temperature drifts as you use the boiler. Many owners add a Gaggia Classic Pro: How to Adjust OPV for 9 Bar modification, but the PID mod is separate.
Stock performance: Steam pressure is strong initially but drops as the boiler cycles on and off. You get about 60–90 seconds of useful steam before the boiler needs to rebuild pressure.
With PID mod: The steam temperature is stabilised to around 145°C (293°F), giving you consistent steam pressure for the entire duration. This makes microfoam much easier to reproduce. However, even without a PID, you can still achieve great results by:
- Steaming only once per heat-up cycle.
- Waiting for the boiler to cool down (about 90 seconds) before steaming again.
| Issue | Severity Level | Typical Cause on Gaggia Classic Pro |
|---|---|---|
| Large bubbles only, no microfoam | Usually not urgent | Over-aggressive stretching for more than 10 seconds. |
| Milk not heating evenly | Needs attention soon | Wand tip not positioned centrally; vortex not established. |
| Steam pressure weak from the start | Needs attention soon | Boiler not fully heated; purge not done; or OPV incorrectly set. |
| Foam collapses after 30 seconds | Needs attention soon | Milk overheated (above 65°C) or no stabilisation phase. |
| Constant wet steam bursts | Urgent | Condensation in wand; need to purge more thoroughly or use a filtered water source. |
| Steaming stops abruptly after 45 seconds | Usually not urgent | Boiler tripped on overheat; wait 90 seconds before next use. |
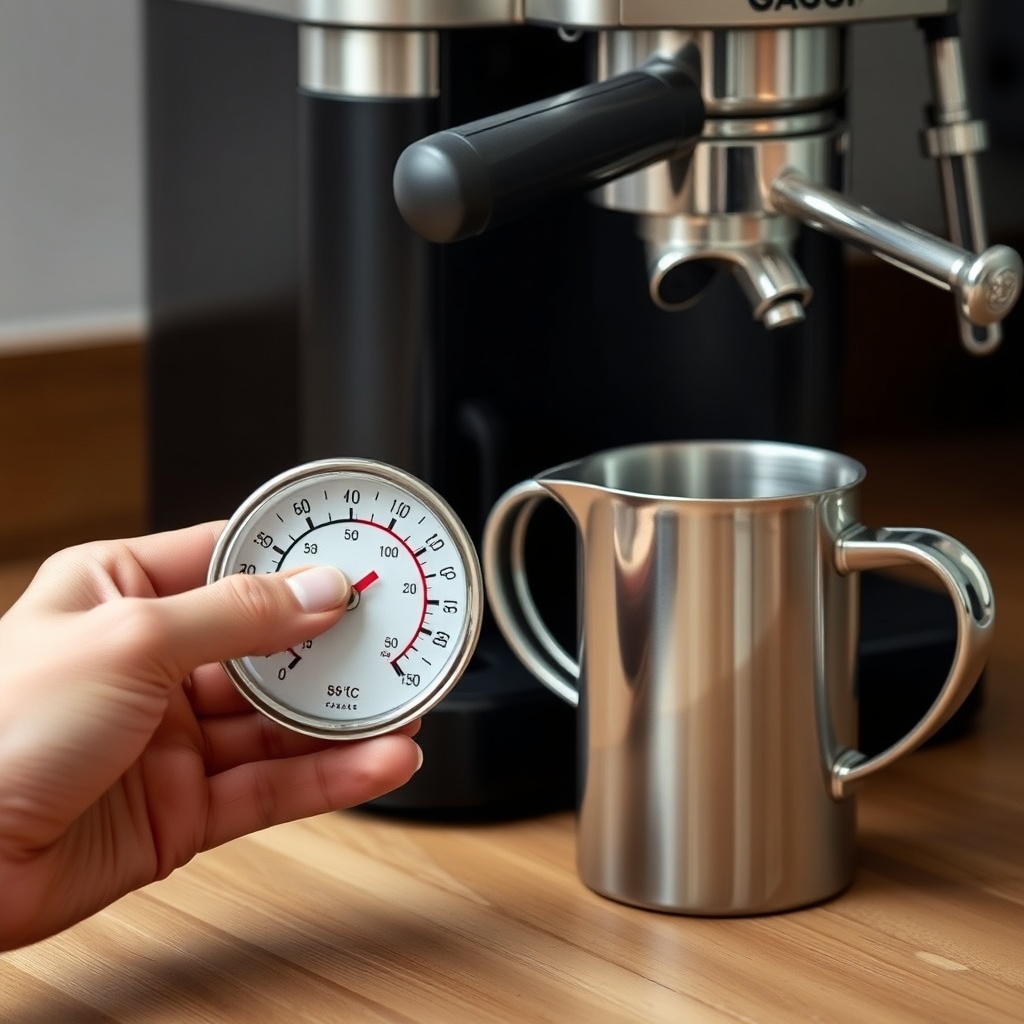
What’s the Ideal Milk Temperature and How Do I Check It Without a Thermometer?
The ideal temperature for microfoam is 55–60°C (130–140°F). Above 65°C, the milk proteins denature and can’t hold bubbles. Below 50°C, the foam will be too watery.
No-thermometer method:
- The pitcher becomes uncomfortably hot to hold with both hands—that’s around 55°C.
- When you can only hold the pitcher with a fingertip for 3 seconds, you’re at 60°C.
- If you see steam rising before that point, you’re likely at 50°C.
Pro tip: Use a digital thermometer until you’re consistent. It costs less than £10 and saves you from wasting milk. Remember, the Gaggia Classic Pro’s steam wand can heat milk in under 25 seconds if you start with cold milk—so be fast.
How Do I Clean the Steam Wand After Every Use?
Milk residue is sticky and burns onto the wand within seconds. The Gaggia Classic Pro’s wand is made of chrome-plated brass, which is durable but prone to clogging if neglected.
Immediate after-use routine:
- Turn off the steam knob.
- Wipe the wand with a damp, lint-free cloth. Do this while it’s still hot—the residue wipes off easier.
- Open the steam knob for 2 seconds to blast out any milk that seeped into the tip.
- Turn off the knob and wipe again.
Deep cleaning (weekly): Unscrew the tip (standard 8mm thread) and soak it in a solution of warm water with a drop of dish soap. Use a coffee shop cleaning pin to clear any dried milk from the single hole. Check the full buying guide for accessory recommendations like a dedicated cleaning kit.
What Owners Say About the Gaggia Classic Pro’s Steaming
“I struggled for months until I realised the default OPV is 14 bar.”
Many owners on forums report that after adjusting their OPV to 9 bar, steam pressure becomes more controllable. One user said, “I could never get microfoam before the mod. After, it’s night and day—the steam is still strong but the bubbles are tiny.”
“The stock wand tip is fine, but swapping to a 2-hole tip improved texture.”
A vocal minority of enthusiasts swap the stock single-hole tip for a two-hole tip (from a Gaggia Coffee or aftermarket). They claim it provides a more aggressive vortex that helps incorporate air faster. But the single-hole tip is perfectly capable—it just requires a slower, more deliberate technique.
“Cleaning is a hassle, but worth it.”
The most common complaint is that the wand is hard to clean if you don’t purbe immediately after use. Owners advise keeping a damp cloth next to the machine. As one owner put it: “If you let it dry, you’ll be scrubbing with a brush for five minutes.”
Frequently Asked Questions
1. Can I use a 2-hole tip on the Gaggia Classic Pro for better microfoam?
Yes. The single-hole tip is excellent for learning, but a 2-hole tip creates a stronger whirlpool, making microfoam easier for some. Make sure to reduce stretch time by 2–3 seconds when using it, as it incorporates air faster.
2. Why does my Gaggia Classic Pro steam wand leak water before steam?
This is normal condensation that forms in the boiler or wand. Perform a 5-second purge before each use to clear it out. If the leak persists after purging, check the steam knob gasket—it may need replacing.
3. How long should the Gaggia Classic Pro take to steam 200 ml of milk?
From a cold boiler, it takes about 20–25 seconds to reach 60°C. The machine’s boiler is relatively small (140 ml), so the water in it heats up quickly. Don’t exceed 30 seconds or you risk overheating.
4. Is the Gaggia Classic Pro good for latte art?
Absolutely. Once you master the technique, you can produce microfoam that supports fine latte art. The key is to avoid large bubbles during stretching—aim for a consistent, smooth vortex. Many professional baristas use this machine for practice at home.
5. Should I use a milk frothing thermometer?
A basic digital thermometer is highly recommended for beginners. Target 55–60°C. As you gain experience, you can rely on the hand-feel method. Some owners also use a Frother Thermometer with a clip to attach to the pitcher.
6. Can I steam milk on the Gaggia Classic Pro without a pitcher?
Technically yes, but it’s not practical. Use a heat-proof glass or ceramic cup, but be aware that you won’t get the vortex needed for microfoam. It’s better to invest in a proper 350 ml or 600 ml milk pitcher.
For further reading on machine maintenance, check out our guide to water filters to prevent scale buildup in your boiler, which can affect steam performance. And if you’re still deciding, our buying guide covers all the pros and cons.